Connect your Bybit API to CryptiDex, step by step
This guide shows how to open a Bybit account, enable Google 2FA, create a trade-only API key, and connect it to CryptiDex Ultra without enabling withdrawals.
No Bybit account yet?
Create the account through the partner link before you generate the API key. Bybit may offer eligible bonuses depending on region and current campaign terms.
Settings required for CryptiDex
- Use a Bybit website account with access to API Management.
- Google Authenticator must be enabled on Bybit.
- Trading permissions must be enabled and withdrawal permissions must stay disabled.
- Ultra uses BTCUSDT linear futures only.
- Use mainnet for live funds and testnet if you want to rehearse first.
Before you start
Full API connection guide
1. Create or sign in to your Bybit account
Open Bybit in a desktop browser. If you still need an account, use the partner registration link first so the reward path is attached before you reach API Management.
- Finish account registration and email verification.
- If API creation is unavailable right away, wait for the 48-hour risk-control window to pass.
- Decide whether you are connecting live funds or using testnet first.
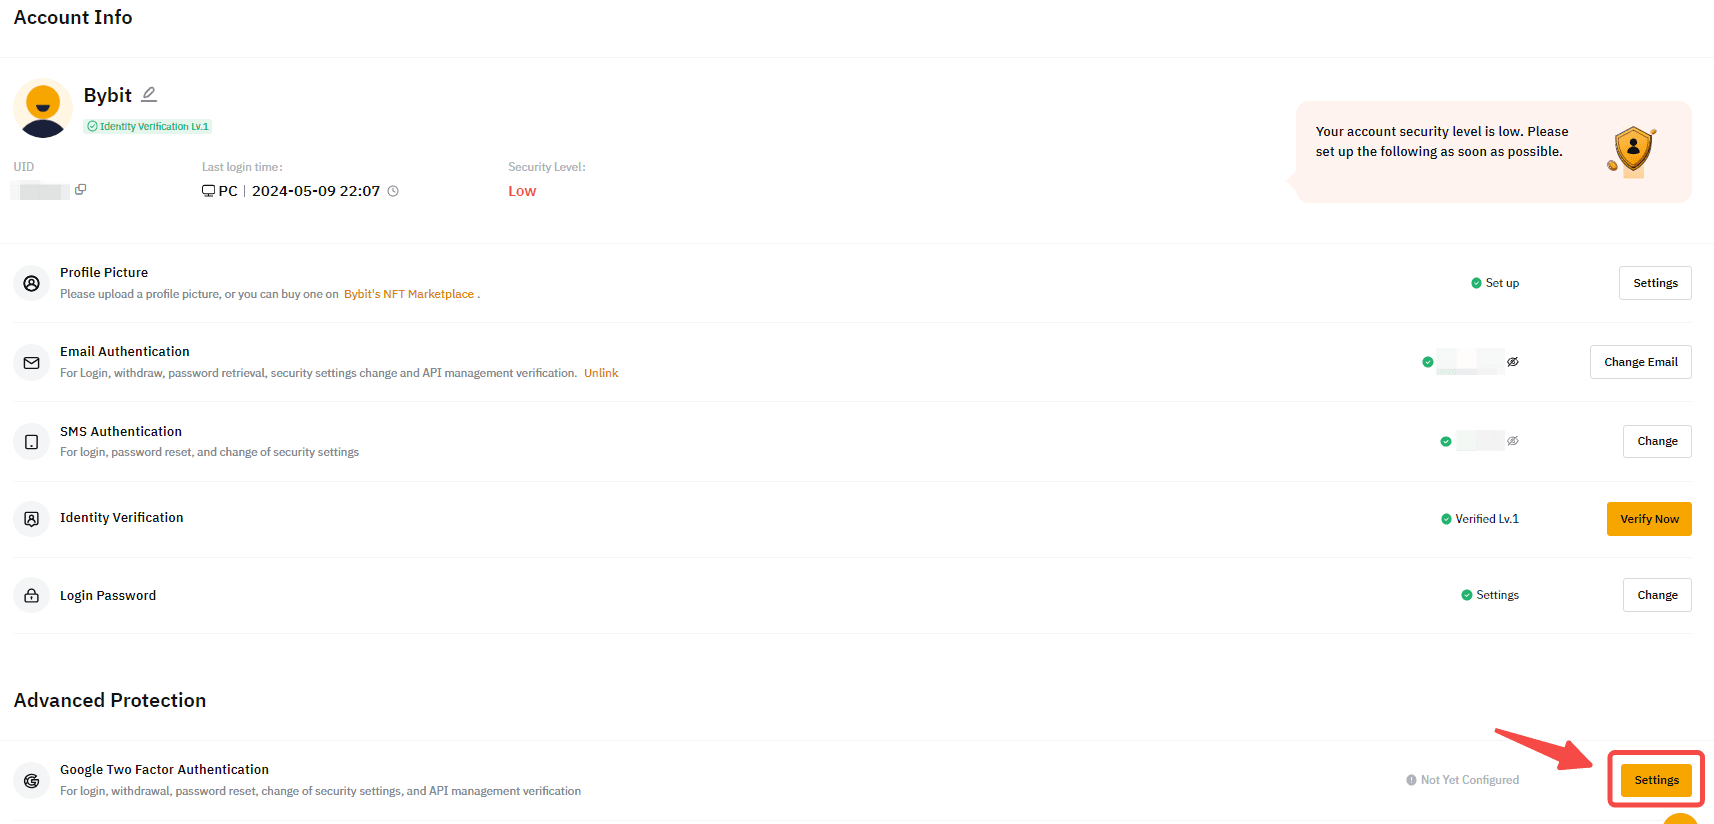
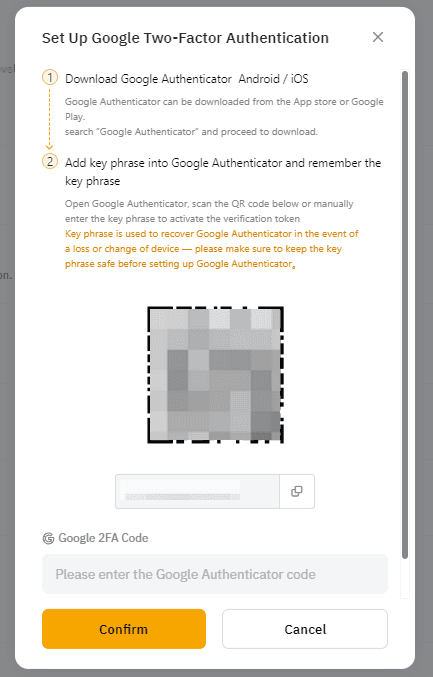
2. Enable Google 2FA on Bybit
Open your Bybit security settings, bind Google Authenticator, and save the recovery phrase before you continue.
- Go to Account Security and open Google Two-Factor Authentication.
- Scan the QR code in Google Authenticator or enter the key manually.
- Store the recovery phrase before confirming the 6-digit code.

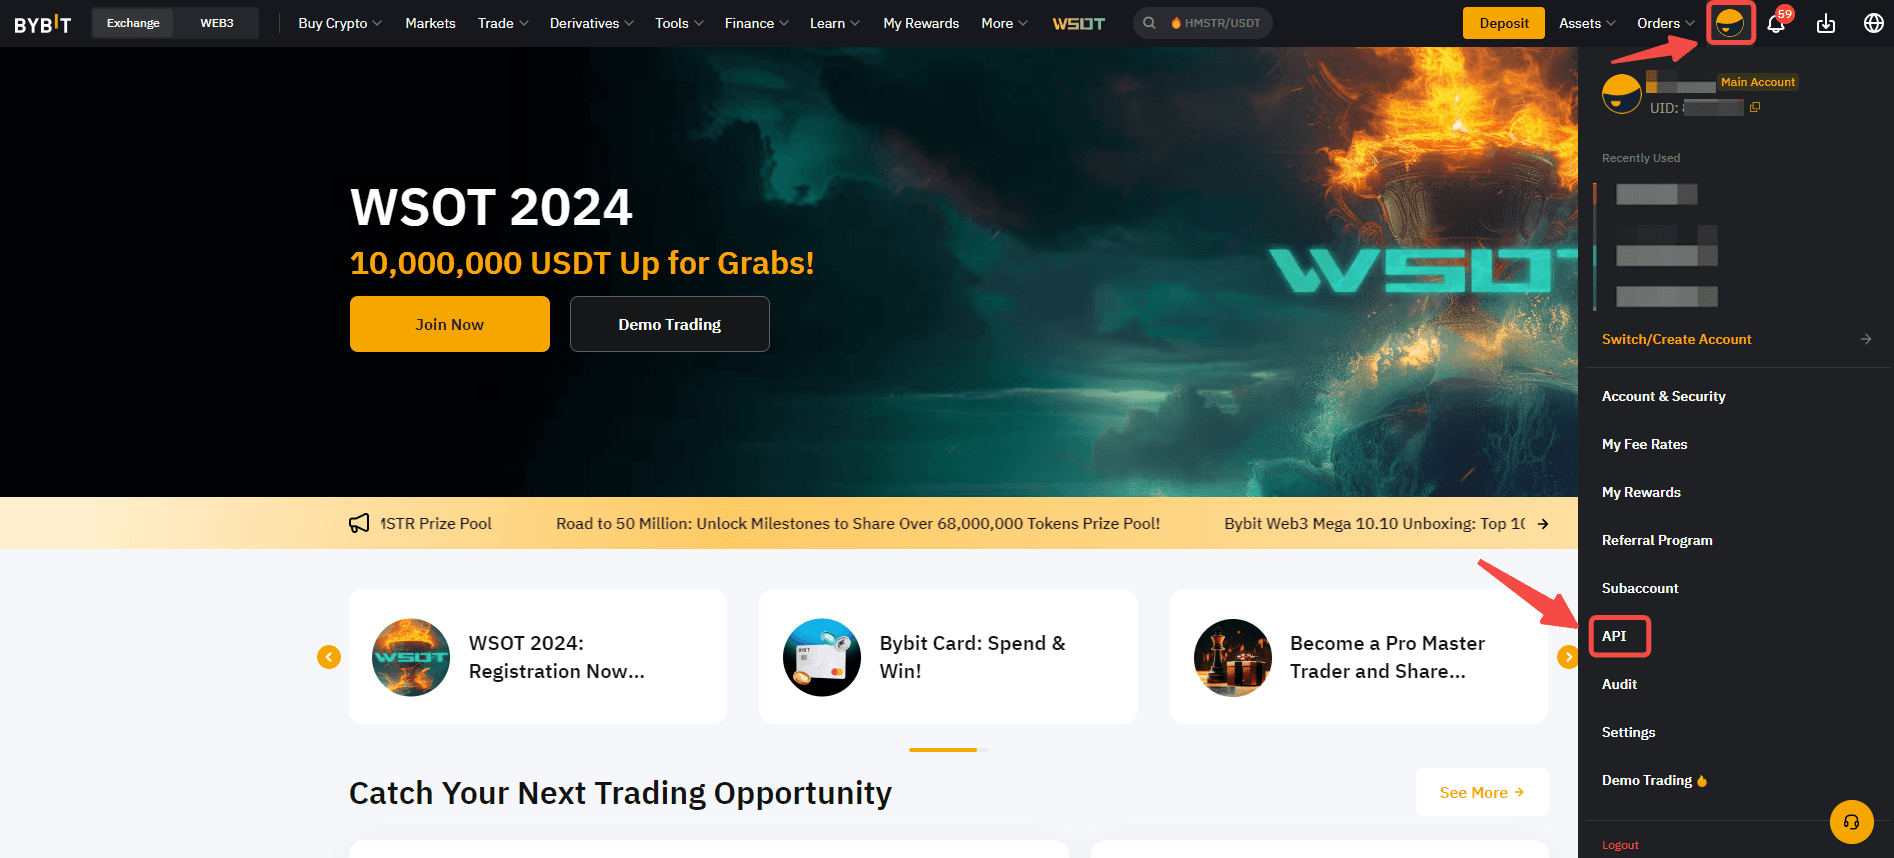
3. Open API Management and create a new key
From the top-right account menu, open API Management and click Create New Key. This is the real starting point of the API flow on Bybit.
- You can use the account menu or open the direct API Management URL.
- Keep the security session active so the 2FA challenge does not expire mid-flow.
- Use testnet API Management only for a separate rehearsal key.

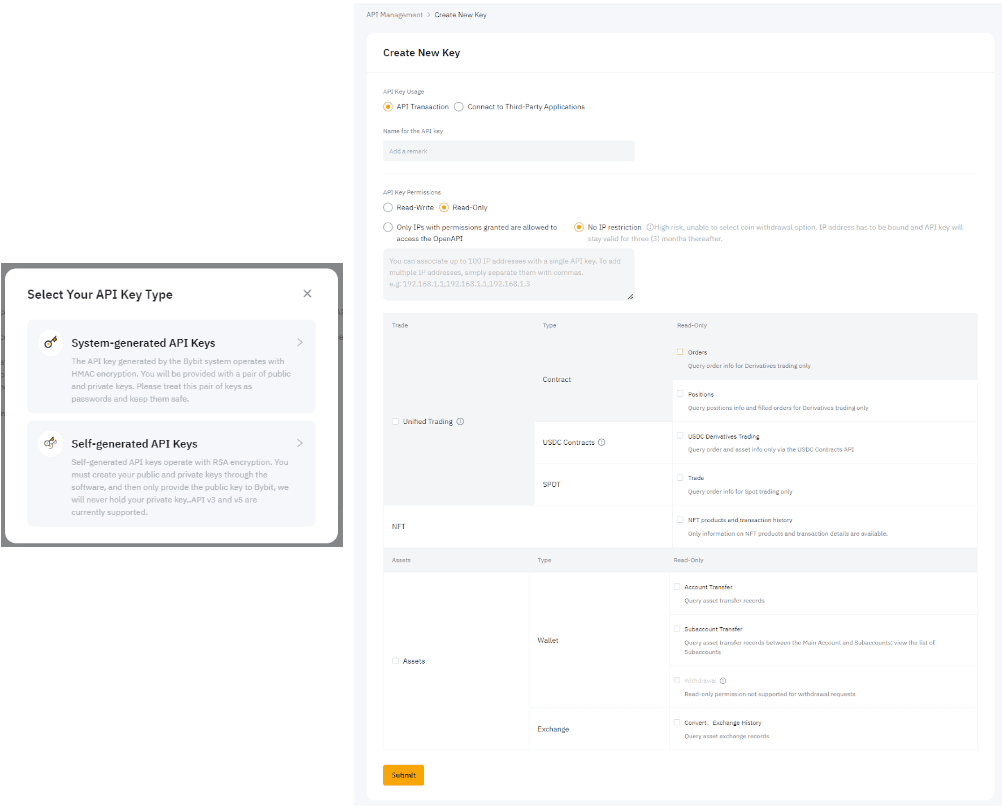
4. Configure the key for Ultra
Choose a system-generated key, keep the account in API Transaction mode, enable trading permissions, and leave every withdrawal permission disabled.
- Use a clear key name so you can identify the CryptiDex connection later.
- Read-write trading permissions are required for orders, stops, and management actions.
- Do not enable withdrawals. CryptiDex will reject that key.
5. Confirm with Google Authenticator and save the secret
Bybit will ask for the Google Authenticator code before the key is finalized. Copy the API key and API secret immediately after creation.
- The API secret is shown one time only.
- Save both values in a password manager before closing the window.
- If the secret is lost, delete the key and create a fresh one.

6. Paste the key into CryptiDex and run validation
Return to CryptiDex onboarding, choose Bybit, paste the API key and secret, and run the permission checker. A valid key must be trade-enabled and withdrawal-disabled.
- If validation fails, remove withdrawal permissions in Bybit first.
- If the key is testnet-only, keep Ultra in testnet mode until you are ready.
- After validation passes, continue to Ultra risk setup and activation.
What CryptiDex checks
- Trading permission is present.
- Withdrawal permission is not present.
- The key still responds to account and order endpoints.
- The connection remains visible so you can re-check or rotate it later.